

Amazon Influencers: Let's Start Your YouTube Channel
The setup that takes one afternoon and pays for years
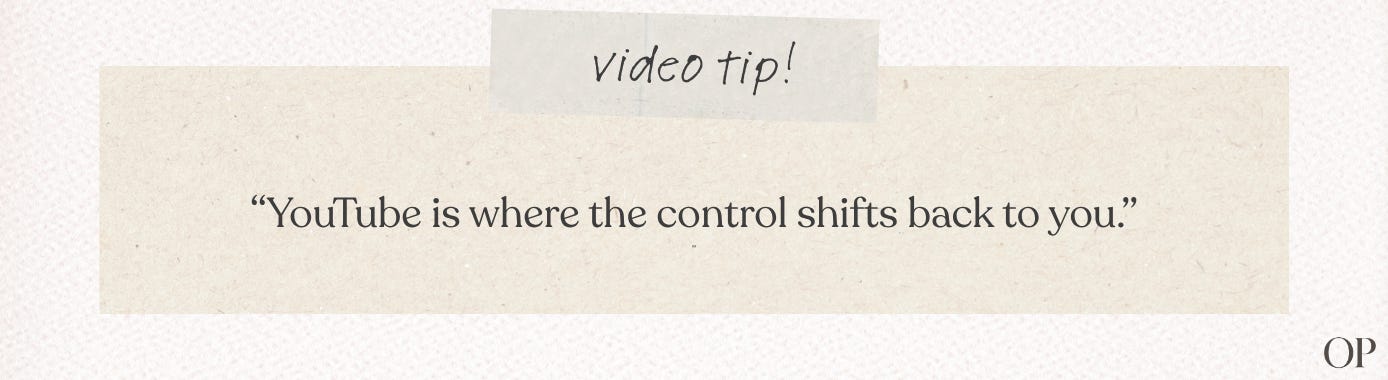
Amazon controls your Influencer storefront. They can change the commission structure, shift the program rules, or suspend an account without warning. YouTube is where the control shifts back to you.
YouTube is the backup plan that doesn’t feel like one. The videos are yours. The links are swappable. If AIP changes tomorrow, you haven’t lost the library, just the destination the links are pointing to. But this is not only about protection. YouTube is also how you learn to drive offsite traffic back through your affiliate links, reaching people who are actively searching for the products you review, not just browsing Amazon. That is exactly what we are going to work through together in this publication.
My Amazon Influencer review channel has ten subscribers. It doesn’t matter, that’s not the reason I set it up.
Let’s Get Started Creating Your Channel
There are two ways you can set your YouTube channel up, and the choice is completely up to you.
The first option is through your existing Google account. Go into your YouTube settings and create a new channel from there. It will be entirely separate, and no one will be able to see any connection between your existing account and the new one.
The second option is to create a brand new Gmail address and build the channel under that login. That’s the route I took. I’ve always preferred keeping my brand separate from who I am as a person, and a dedicated login for the review channel keeps that separation clean from day one. Either way, everything from the initial creation forward is identical.
Before We Go Any Further, Let’s Talk About Your Channel Name and Bio
Most people choose to match their YouTube channel name to their Amazon storefront name. That consistency makes it easier for people to find you across platforms, and it reinforces the same brand in search results. That said, the choice is yours.
Think about what your ideal viewer would type to find you, and let that guide the name.
Your bio works the same way. I treat mine like a version of my storefront bio, written for YouTube rather than copied from it. Same ideas, different words. You want the language to feel natural to the platform, and you want to use the kind of words your ideal viewer would type into a search bar. Keep it short, keep it specific, and make sure anyone landing on your channel for the first time understands exactly what kind of content you publish.
I also add this in my bio: As an Amazon Associate, I earn from qualifying purchases.
Your Brand New Channel Has Some Limitations. Let Me Explain.
A brand new YouTube channel cannot post clickable hyperlinks in descriptions, cannot upload videos longer than fifteen minutes, and cannot use custom thumbnails. Those features are locked until you unlock advanced eligibility.
The fastest way to do this is through ID Verification. You upload a photo of your driver’s license or passport, and once it is approved, usually within a few hours, those features open up. It is standard verification that you are a real person and not a bot. There is also a video verification option and a two-month channel history route, but ID verification is the fastest way through.
Until advanced features are unlocked, your affiliate link in the description is not clickable. This is a very important step to make sure you complete before we move on to uploading your videos.
This Next Step Is About Staying Compliant With Amazon’s TOS
Before we move any further, we need to make sure you are compliant with Amazon’s terms of service.
Go to your Amazon Associates account, open Account Settings, and find the section where you manage your approved websites, mobile apps, and Alexa skills. Add your YouTube channel URL there. You are registering the channel as one of your approved properties.
Now That Your Channel Is Live, Let’s Set Up Your Disclosure Template
Your very first stop on YouTube is creating your disclosure template, and here is why. YouTube has an upload defaults setting that auto-populates in every video you publish from that point forward. Setting this up now means you will never accidentally publish a video without your affiliate and FTC obligations covered. Once you have done this, it will appear in every video description when you go to publish.
To find it, go to YouTube Studio, click Settings in the left menu, then click Upload Defaults. That is where you will add your disclosure text in the description field.
Go ahead and open that setting, and I will show you how mine typically looks. You can make it your own, as long as the proper disclosures are in there.
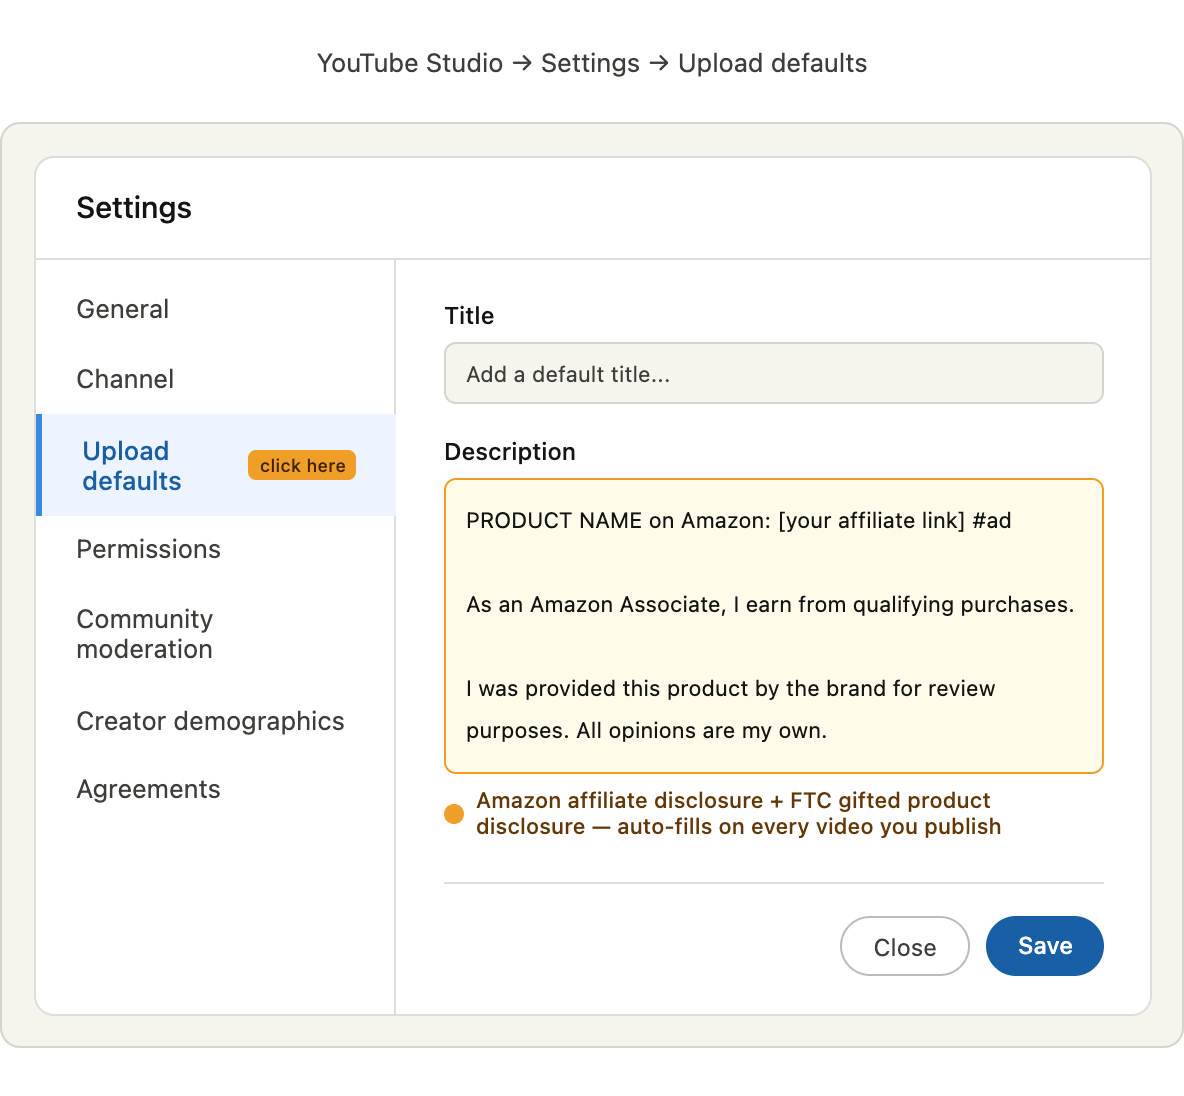
Notice I said Associate, not Influencer. When you are posting offsite, you are operating as an Amazon Associate.
If a product was gifted, that gets its own written statement, that is your FTC disclosure. Think of it the same way you think about saying it verbally in your videos. Go ahead and add it to your upload defaults now. If you are reviewing something you purchased yourself, you can erase it before you publish. Better to be covered than to forget.
Here Is the Final Step for Today
Let’s add your email address to your channel profile. Go to YouTube Studio, click Customization in the left menu, then Contact Info. Scroll to the bottom and you will find the Contact Info section. Add your email there and hit Publish. Brands actively search for creators through YouTube.
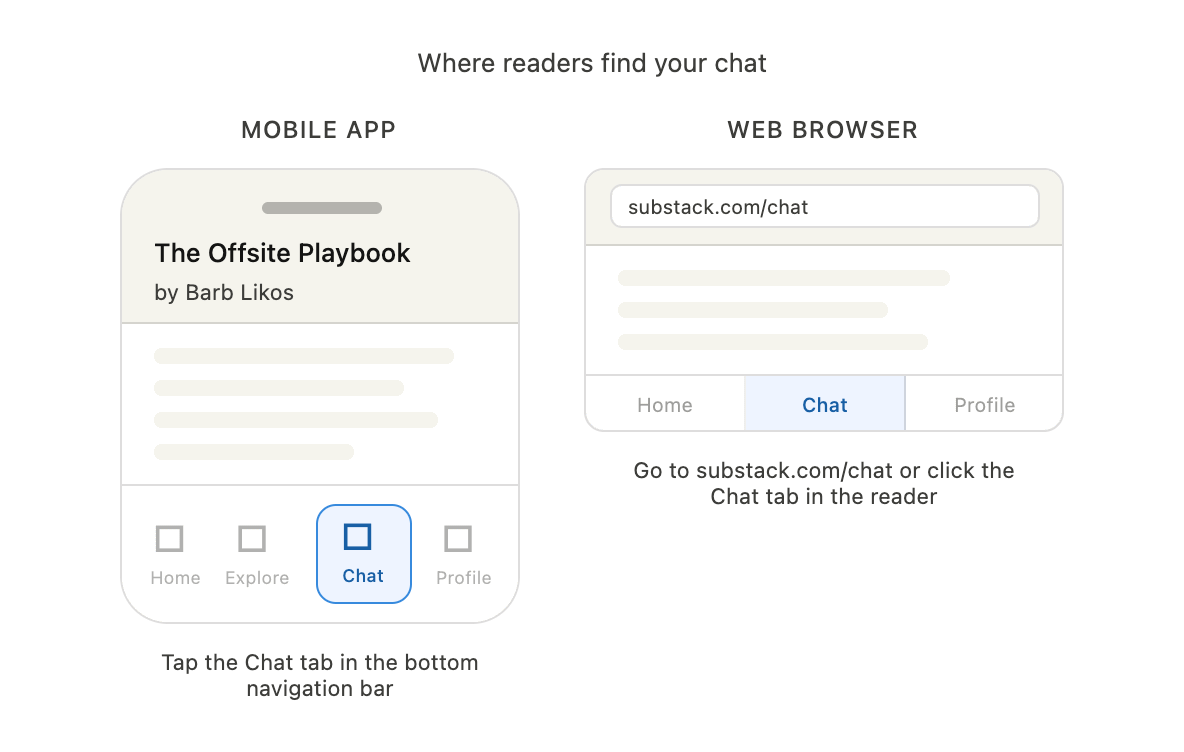
If you have questions throughout this process, you can reach me through the Chat tab on this publication. On mobile, you will find it in the bottom navigation bar of the Substack app. On a desktop browser, go to substack.com/chat.
Barb Likos has been building online income since 2008. You may know her from the Grace, Inspired brand. The Offsite Playbook is where she writes as herself.